November Island Batik Challenge

This month’s Island Batik Challenge is all about the ByAnnie bags. Have you heard of ByAnnie bags and purses before today? Annie Unrein started designing these patterns back in 2000.
I have made many different types of bags over the years, including some by ByAnnie. To me, ByAnnie patterns are by far the best when it comes to instructions, lay out, add-on videos, and ease of assembly.
As an Island Batik Ambassador, ByAnnie was kind enough to let us choose whichever pattern of theirs we wanted to make… yes, I said any pattern! I have previously spent hours upon hours on the ByAnnie.com website and only dreamed about all the items I would love to make. So off to the ByAnnie website I went to figure out which one I was going to pick. I found out rather quickly that choosing only one pattern turned out to be more difficult than I thought it would be.
Which one do I want to make? And what will I do with it when it’s finished? How big of a project should I pick? Should I go small and easy? Or knowingly pick a pattern that looks kind of hard, challenging myself to step out of my comfort zone?
You guessed it, I went big… again!

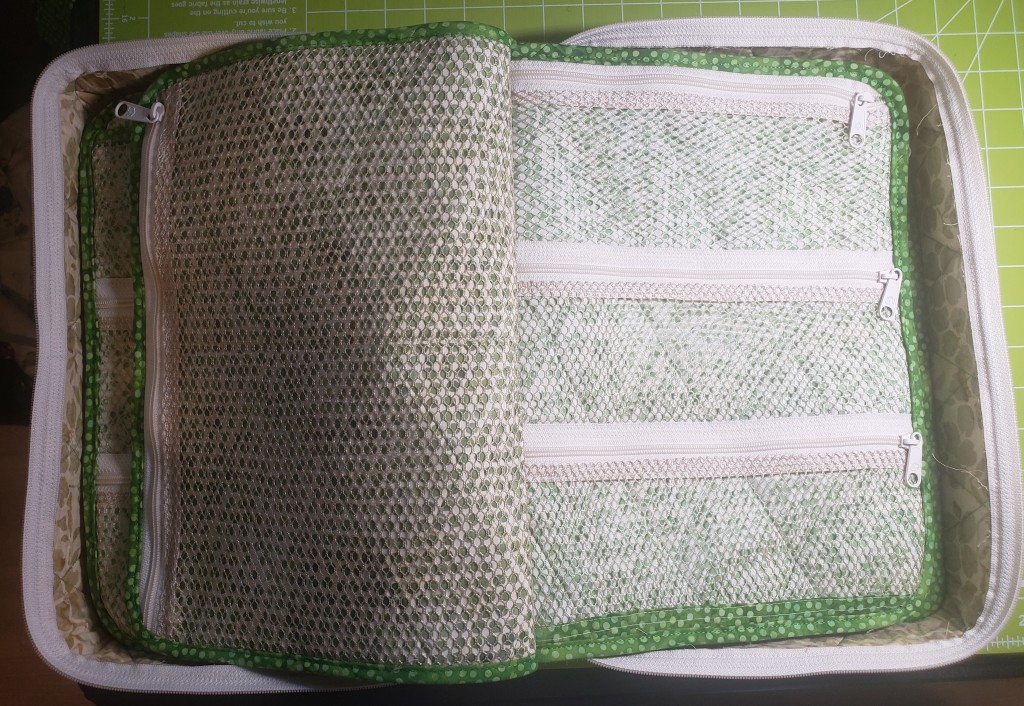
When my supplies arrived, I opened the box and everything I needed to make the “A Place for Everything 2.0” ByAnnie bag was in there!!! There was 20 half yard cuts of fabric, Soft and Stable (created by Annie Unrein herself), strapping, hardware, the pattern, a coupon for the add-on videos, zippers, stabilizer, vinyl, mesh, and thread. What more could a gal ask for?

The first thing I did was go to ByAnnie.com and watch the add-on videos to find out what trouble I had gotten myself into. After watching the videos, I thought “this doesn’t look so bad…” Ha!!! This certainly wasn’t the first time I’ve underestimated my choices!
This time, for some reason I had a hard time wrapping my brain around the instructions, so I grabbed another cup of iced coffee and took another stab at it. Picking out the fabrics was next on the list; I went with a few greens and tans from the Flour Sack line by Kathy Engle. Now to decide where each color fabric is going to go on the bag. Once this was done, I was ready to attach the fabrics to the Soft and Stable. I used Quilters Select Free Fuse powder to adhere the fabric to the Soft and Stable with my iron. Then, using a Frixion pen I drew my quilt design on the fabric so I could easily quilt the two together. After the quilting was done, I then used the iron to remove the Frixion pen lines (yes, they disappear with heat).

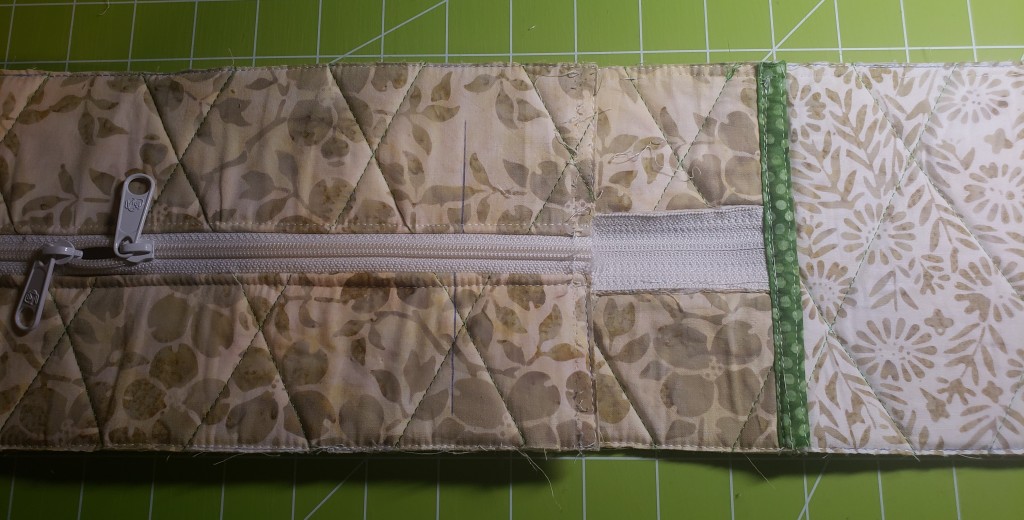
Cutting out the rest of the fabrics was straightforward, and once everything was cut out, I was ready to start putting the pieces together. Everything seemed like it was going well until I realized that I had cut a section too short and had to remake it, which meant I had to cut a new piece of fabric, adhere it to the Soft and Stable, and then quilt it. Now that that’s done, things appear to be moving in the right direction. But first… I need more coffee. Now with a full cup of iced coffee, I’m ready to start putting the front pocket section together. The ByAnnie directions are very easy to understand and would have made doing this project a breeze, if I had followed the steps. Well therein lies the problem. In my excitement to get started I sewed the zipper onto the pocket section, and after looking at it, I realized I had skipped a step! So, I grabbed the seam ripper, at which point I concluded that it’s time to take a break, walk away and regroup. And of course, get more coffee!!!

It’s the middle of the night now, when it’s the quietest time of day, and most everyone is sleeping. Everyone except me. After this little break, I got back in the saddle, got back on track, refocused and tried again. Finally! The front and back pockets are complete! Woo-hoo!
Next, I’m going to tackle the inner sections of the bag, called “pages,” aka pockets. Two of these are removable, and two of them are sewn in. I finally feel like I’m making headway, picking up speed and things are going together easier, until I realize that I cut a piece of mesh too short. But this time I have no leftover mesh to cut a new piece. So, now what? Here comes another one of my bright ideas! I improvised and decided to add a piece of fabric to the bottom of the pocket as if that’s exactly how it was supposed to be. No one will ever know that I made a design change unless I tell them, so shhh! Don’t give away my secret.
With the two inner pockets completed, I found myself thinking about that first piece that I had to remake because I had cut it too short, and what creative thing I could make with it. I decided to make an ironing mat out of it! Remember, I’m the self-proclaimed scrappy queen, and nothing goes to waste in this house!!
Next, I added the whopping 38” zipper for the bag closure. This was straightforward and done without any glitches. I even got my quilted lines to match up pretty good, if I do say so myself.
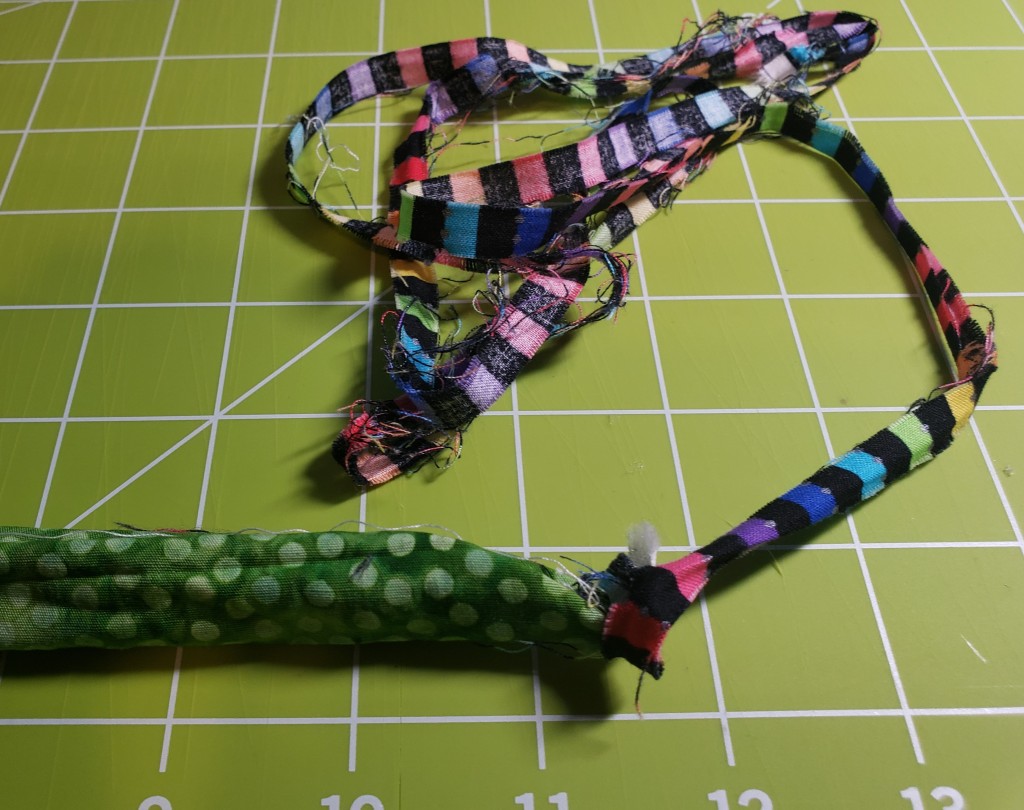
Now comes the fun part – making the handles. I’m not one who likes to turn long skinny things right side out, so, I decided to use a little hack that I once saw somewhere. When sewing the pieces of fabric right sides together, I sewed another piece of fabric – a bit longer than the length of the handle – to the narrow end of the tube. Once it was sewn, I grabbed the fabric strip and pulled the strap right side out. It works like a charm every time!


In my excitement to sew the handles to the bag, I skipped over some important steps and sewed the pocket on first, and you know what that means… out comes the seam ripper again, to take it apart.
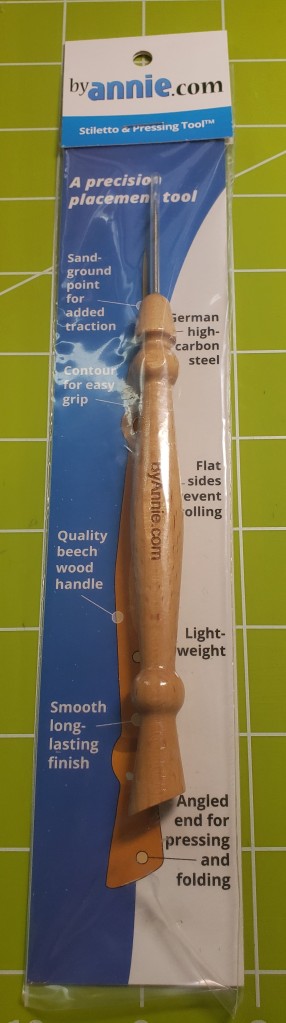
Back on track and nearing the finish line, everything is done except to attach the zipper to the front and back, and of course I did it wrong. You guessed it! I grabbed the seam ripper again and started ripping! My second attempt went smoothly! Now the only thing left to do is sew on the binding, and for whatever reason, I like this part. Maybe because it means that I’m almost finished with the bag. Top stitching the binding to the outside edges of the bag can be a bit tricky, but if you have the ByAnnie stiletto it’s a breeze.
I did it! The bag is finally finished!

Thank you to ByAnnie for the generous gift of supplies and pattern to make this great bag.
Schmetz needles are the bomb and did an amazing job getting through all the layers of fabrics and Soft and Stable.
Aurifil thread is my go-to thread for this project and guess what!!! Mine matched this time!
So, what did I learn this month?
Again, I picked a large project when I could have gone smaller… surprised? Not really. But next month I promise it will be a small project.
ByAnnie instructions are best when you follow the steps as written and check off the boxes when complete.
Skipping steps is not the end of the world, it’s an opportunity for me to use my creativity, which is one of my favorite things to do!
Having the right tools for the project is very helpful and makes life easier.
Until next time, what is on your sewing table today?
Victoria aka Tori

Leave a comment