For the month of March we were allowed to pick any project of our choosing. After last month’s challenge I am ready for something that is a little bit more up my alley.
In case I didn’t previously mention this, I am an avid paper piecer and at one point in my quilting life I said I would never do traditional piecing again. As you read in last month’s post you will see that saying never gets me into some trouble and I end up doing what I say I will NEVER do!!
When COVID hit I decided to give traditional piecing another try and I actually loved it!! I had no idea what I was missing! Now I’m working on perfecting my 1/4″ seams; practice makes perfect, right? Well, it might be a while before that happens, and as every quilter knows there is no such thing as perfect, just finished.
So on to the March Challenge as an Island Batik Ambassador for 2023 and back to what I do best, paper piecing!!
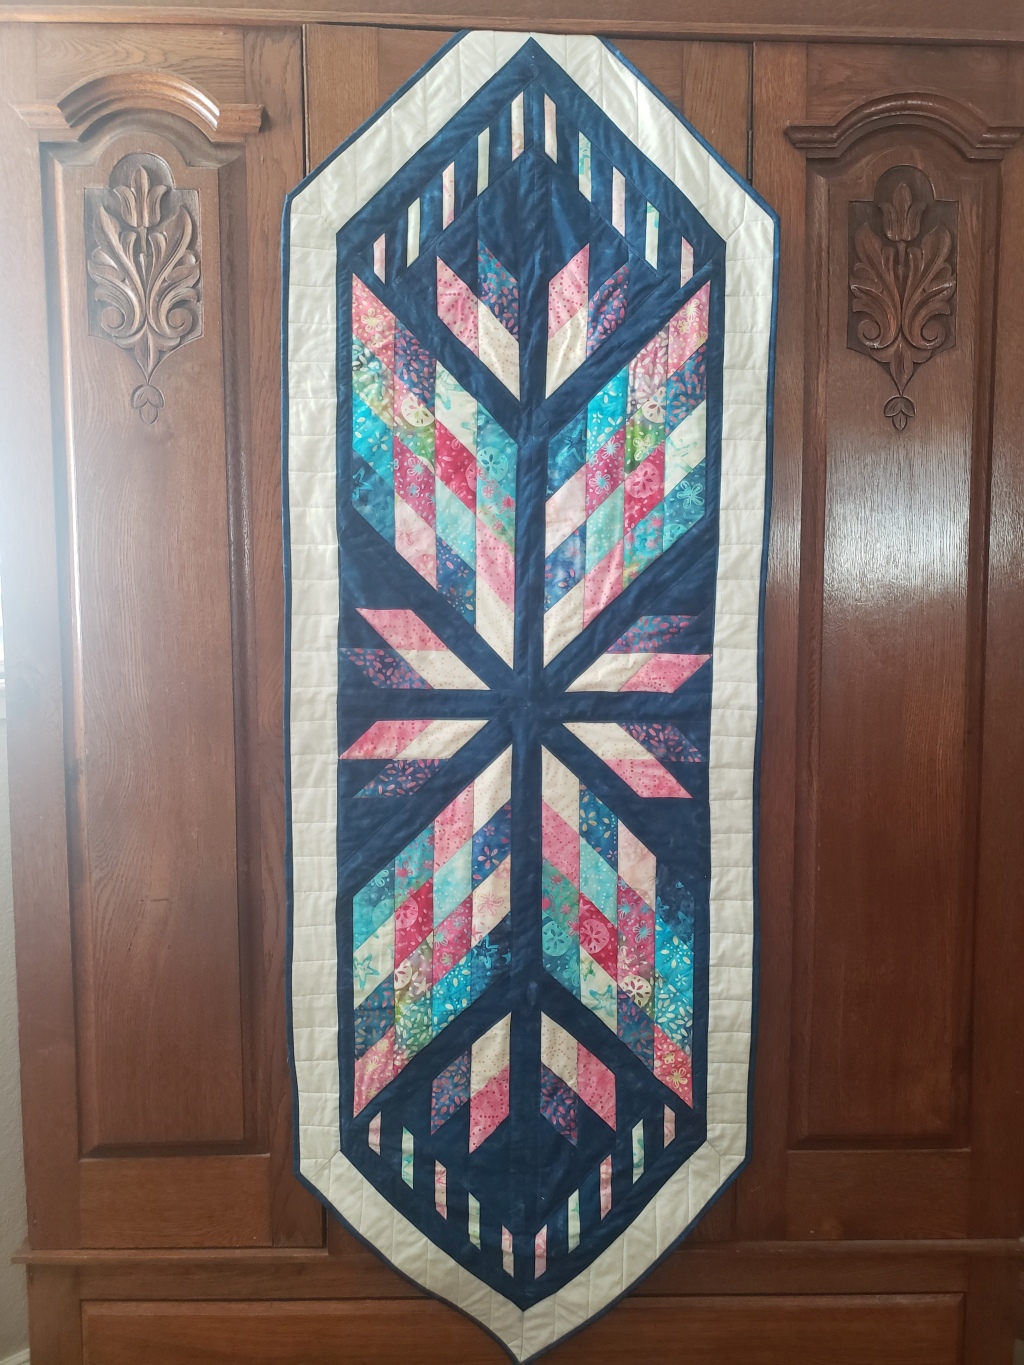
For March I chose to use a pattern called Prism by Judy Niemeyer of quiltworx.com. I am actually a Certified Instructor for Judy Niemeyer and have been for almost 10 years so maybe it’s cheating to do one of her patterns but I needed a break to reset and recharge after my All Puffed Up quilt challenge.

In my stash of patterns was the Prism pattern but it was just a replacement paper pattern, which means that there are no instructions. The idea behind the replacement papers is that you have already made the quilt once before so you already have the instructions and you just want to make another one. Well, I didn’t have the instructions but as an instructor I should be able to make any pattern without the instructions, right??
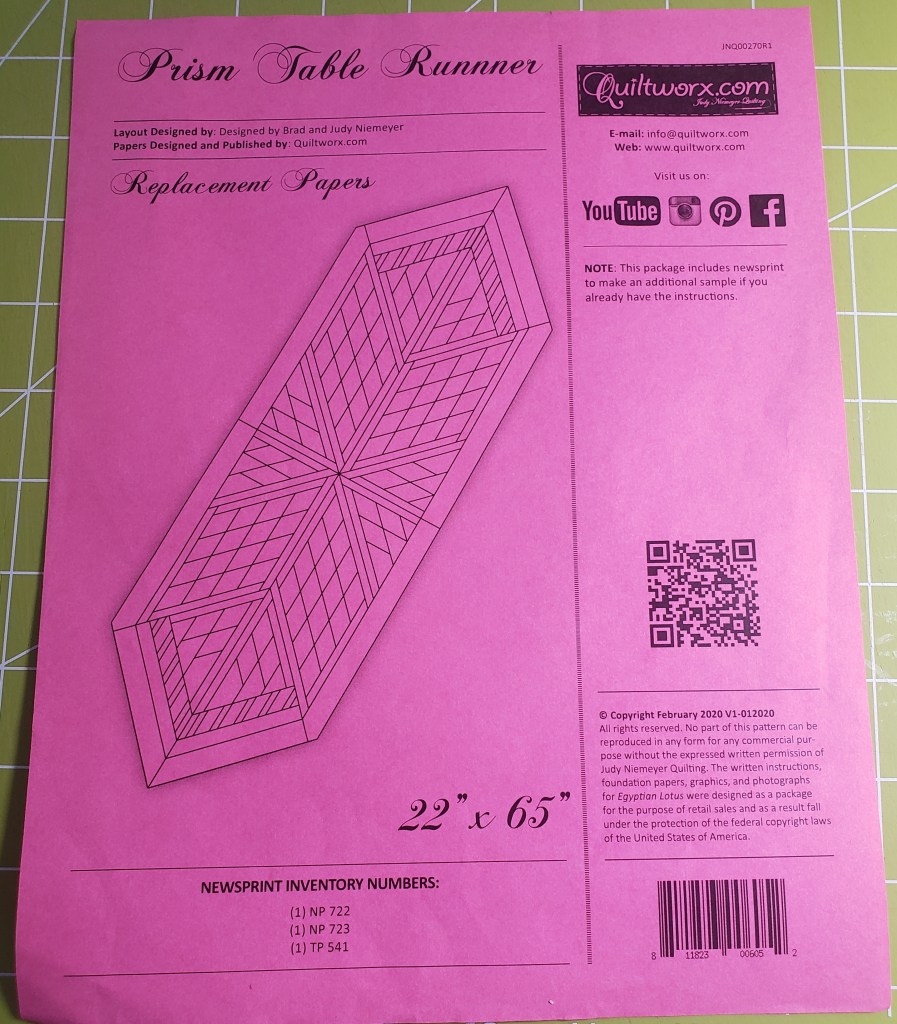
That statement is true because every other year Judy comes out with a new “technique of the month” and the instructors get the pattern well before the instructions are written. In fact, Judy says we are her pattern testers.
So why was this pattern so hard?? I called a friend and asked her to send me a copy of her instructions. She said she would do it when she got back to work on Tuesday. So why didn’t I just wait for the instructions? Because I can do this, it’s just a table runner, it’s small, I got this!
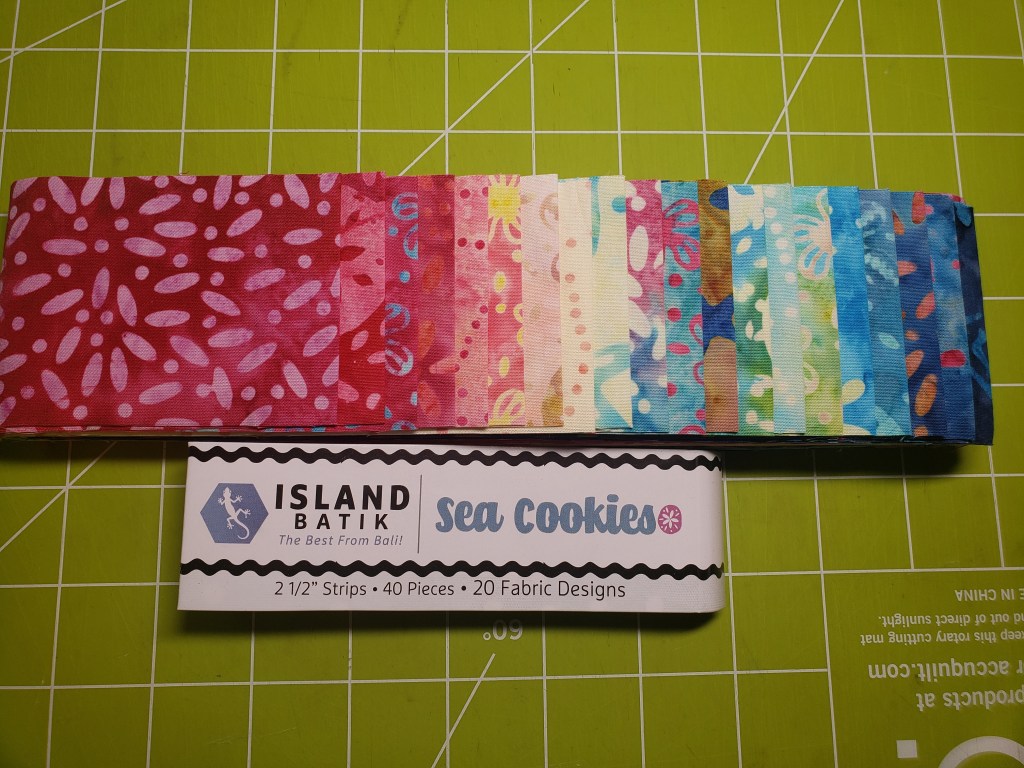
I started by picking out the Island Batik fabrics that were sent to me and I was on a roll with color choices but quickly realized that I had picked the wrong fabrics. Part of being an Island Batik Ambassador is following “instructions,” which I don’t do very well; did you read that last paragraph? After much thought and kicking around the idea that I don’t want to follow the instructions, I came to my senses and gave in. I went back to the big box of goodies I got from Island Batik and found the fabric intended for the March challenge, and low and behold, using the right fabrics actually made the process easier.
With my Island Batik Sea Cookies strip pack and 2 yards of Ravine blue from the Brilliant Blue collection for one of the borders I set out to make my table runner.

First up on the list of fun things to do is figure out where all of the fabrics will go. Now with the instructions this would have been a bit easier but with my determination to get this project done right now I just went for it.
First, I cut out all of the papers, which included the template papers used to cut out the fabrics, and the foundation units that the fabrics will be sewn to. I am a stickler about using a ruler to cut out my papers because I believe that if the papers are trimmed to a 1/8″ the project will come out much nicer. So, ruler in hand, I cut them out exactly 1/8″, a bit over done I know, but that’s just me.
Judy’s paper templates are great for cutting out your fabrics. Judy has made the templates a bit larger to ensure that you have enough fabric to cover the foundation units with some to spare.
With my papers and fabrics cut out I am ready to sew this table runner together. I work on the diamonds first and get that section all put together and trimmed. I set them aside and then work on the next section which is a smaller version of the diamonds.


Time for the final assemble and I realize that I am missing a piece, gee wouldn’t the instructions have come in handy at this point but no I didn’t wait to get them so lets see what I can figure out.

I sew the sections together and realize that I am short a piece so now I need to figure out what I can do to make this work. I get out my ruler and measure how short I am. Actually I’m 5’1″ short… but back to my project. I am about a 1-1/2″ short so I cut out a strip of fabric and add it to the table runner. My placement was a bit off so out comes the seam ripper and un-sew what I just did. Second time I get it right, we are on a roll. Now to do the rest of the sections with the same method by adding that extra piece.
All the sections are complete and now on to the final assembly. This goes pretty smoothly so all that is left to do is the outer border. But wait! I have to miter the corners! Good thing I know a shortcut or two (is that cheating) on how to get this part done. Again not following the rules, but as the saying goes, rules are made to be broken, right?

With the borders on, I’m finished except for stitching around the entire table runner an 1/8″ from the edge to keep it from stretching when it is put on the long arm.
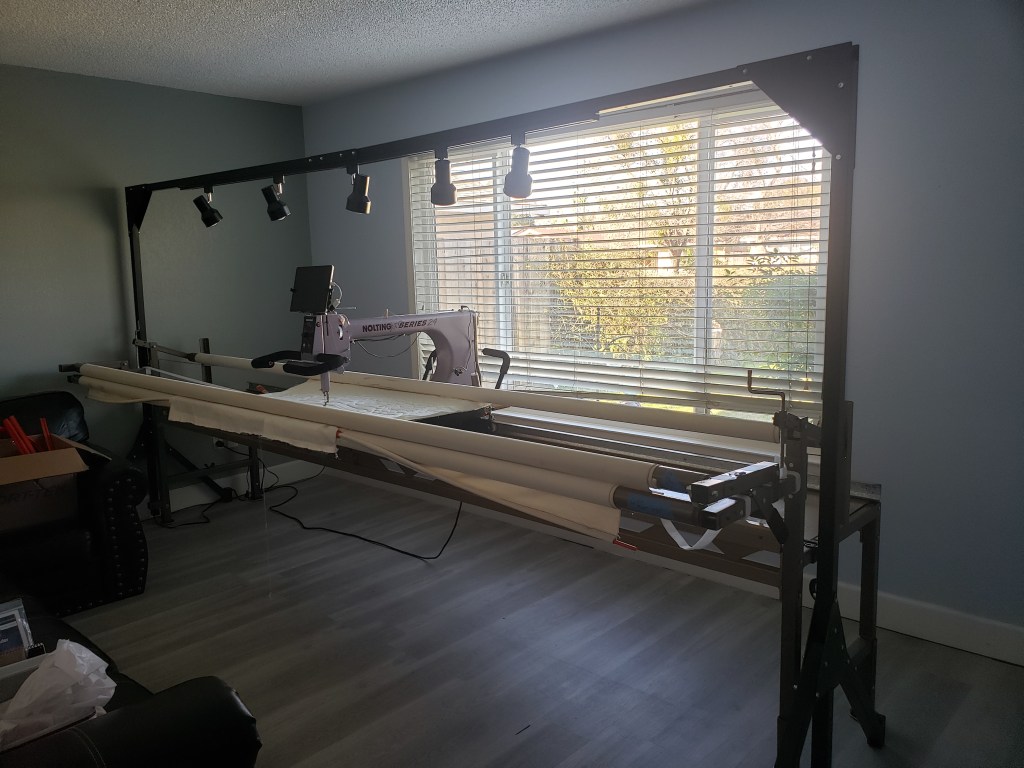
Now the longarm is another challenge for me. I just bought one with my sister and we have not yet mastered the computer software in order to actually make the quilting work. Wo, without the longarm, I decided to start the project for April, get that finished, then start the project for June, and then focus all of my efforts on learning on how to use the software for the longarm. I’ll get to working on that when my sister gets back from visiting her daughter and new grandbaby. This new experience with a longarm is a joint venture with my sister, and we have commit to learning together how it works, even if it kills us doing so! On a side note, we started with a practice quilt and got frustrated to the point where my sister wanted to smack me, so we took a break and got a little Mexican food and will pick it up again another day. Seriously though, my sister and I love each other very much and get along so well (we’ve even known each other since we were little), we would never resort to physical violence!!!
Yes, we put the longarm in my living room, isn’t everyone’s? Now to get rid of the large couch and chair, and then rearrange what’s left of the furniture.

Oh look! Another quilt on my design wall, aka my bed. Maybe I should invest in a design wall? No, wait! I have one in my sewing room and it has another project on it! Maybe I’ll finish that quilt so I can use the wall intended as my design wall? Nah… not today, it’s been up there 3 years already, so what’s the rush?


This is what has been on my design wall for the last few years, it is a Jacqueline de Jonge Be Colorful pattern called Dream Flight. I will be trying to finish up this quilt along with a few other Be Colorful quilts this year. Wish me luck.
So what did I learn this month? I learned that just because I can make a Judy quilt without the instructions I can not make a table runner without them. It would have been better to wait for my friend to send me the instructions and then make it, but who follows the rules, not me! I learned that using the right fabrics does make a difference in how things come together. So I will take into consideration next time when I get a bright idea to be in a hurry that maybe taking a breath and waiting a few days might save me some redo work. Oh, and I ended up quilting the table runner on my Bernina 570 QE. This will be the last thing I quilt on my domestic machine; let’s just say that it wasn’t as fun quilting it on my sewing machine as I remembered it to be, and I am looking forward to learning the longarm and saving time in the process.
Also in my hurry to make my projects and get ahead of the plan with retreats and travel headed my way, I lost the name of the blue and cream fabrics. But guess what! I have a plan. I was going through my files and stumbled across a worksheet that will help me list all of the things that I use to create projects in the future. Here is my new tracking sheet provided by one of my friends from kindergarten, Lorri Duarte (QuiltedPleasures, Etsy). I will attach it here for anyone else who is facing the same challenges I did when I became a new Island Batik Ambassador for 2023.

You can find this Project Tally Worksheet at http://www.huntersdesignstudio.com
Thank you to Island Batik for the Sea Cookies Strips, Ravine Blue for the border and backing, Cream Solid for the border; Hobbs Batting for the 80/20 Bleached Cotton Batting; Aurifil 50wt for the thread – 4060 variegated grey for the main construction, Aurifil 2026 cream for the border construction, and Aurifil 2775 blue for the final quilting; and to Schmetz for the needles to create this table runner.

Until next time what, is on your sewing table today??

Leave a comment